In this lesson, you’ll create a scenario that repeatedly taps a position with random variation.
You will learn:
✅ How to configure random options for Tap steps
✅ How to verify that randomness is working as intended
📥 Download the prepared scenario
(optional – for reference or comparison)
1. Create a Scenario
Create a new scenario for this lesson.
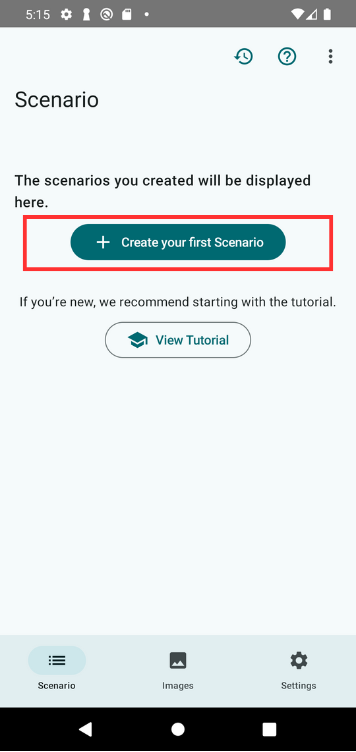
If this is your first time, tap “Create your first Scenario” in the center of the screen.
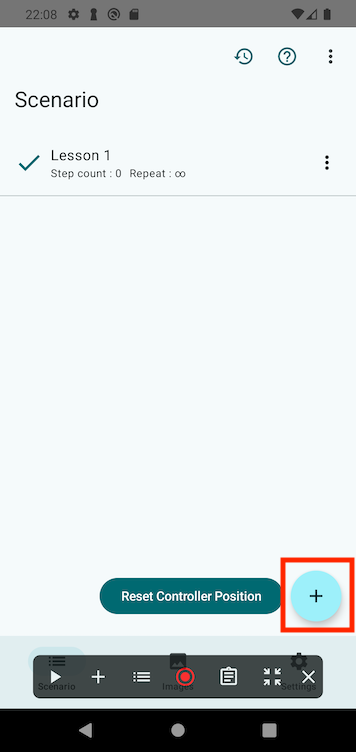
If you already have one or more scenarios, tap the + button at the bottom right.
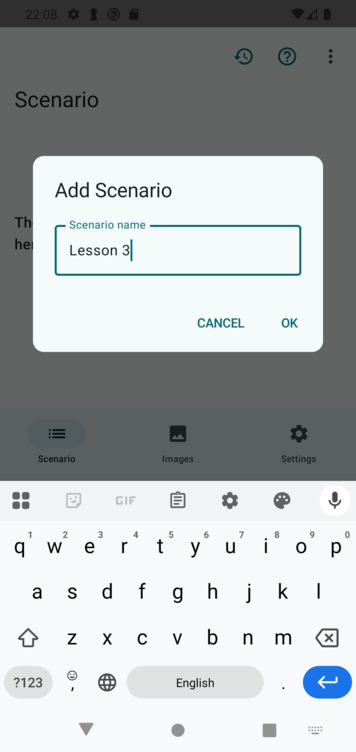
Name the scenario something clear like “Lesson 3”, and tap OK.
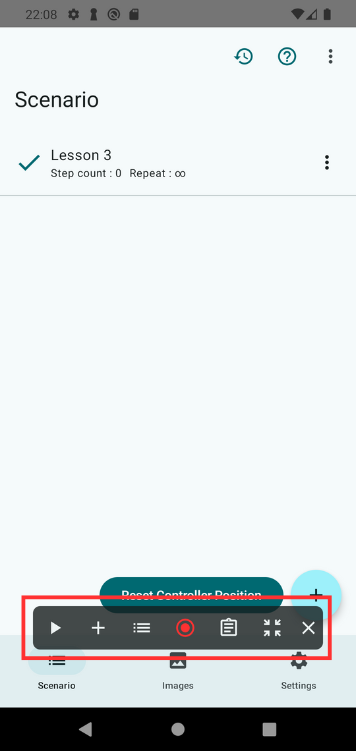
Once created, a control panel called the Scenario Controller will appear at the bottom of the screen.
2. Open the Practice Screen
Open the practice screen from TapEzy’s settings.
In TapEzy’s settings, tap “Launch Practice Screens”, then select “Random Tap Visualization”.
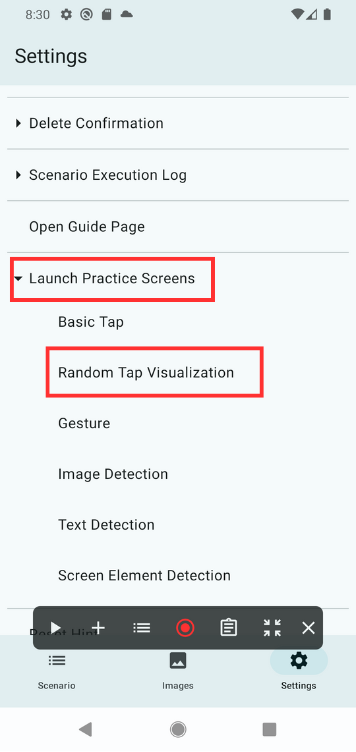
A screen with a crosshair-like marker will appear.
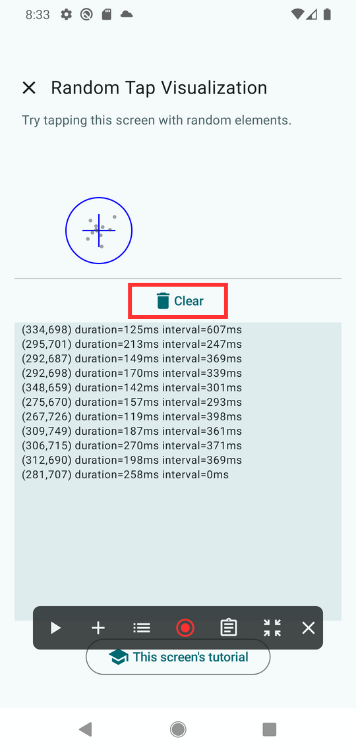
When you tap near the marker, the tap position, touch duration, and interval since the previous tap will be displayed on the screen.
Try tapping near the center of the marker a few times.
Text will be shown near the bottom of the screen in this format:
(x-coordinate, y-coordinate) duration=xxxms interval=xxxms For example:
(297,683) duration=150ms interval=368ms
This means a tap was made at position (297, 683), 368 ms after the previous tap, and it lasted for 150 ms.
Once you’ve confirmed that taps are being logged correctly, tap Clear in the center of the screen to reset the history.
3. Add a Tap Step in TapEzy
Let’s add a tap step to tap near the marker in the practice app.
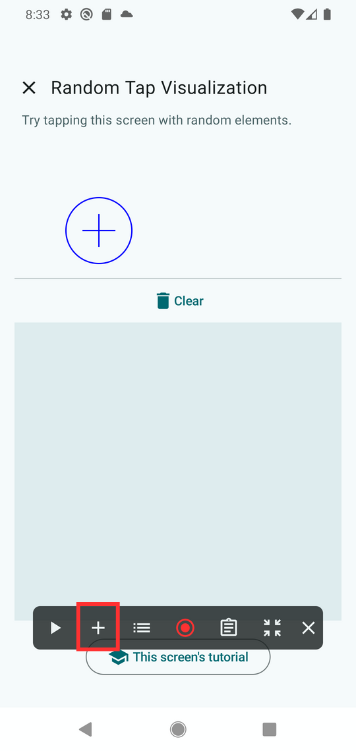
Tap the + button in the Scenario Controller, and select Tap.
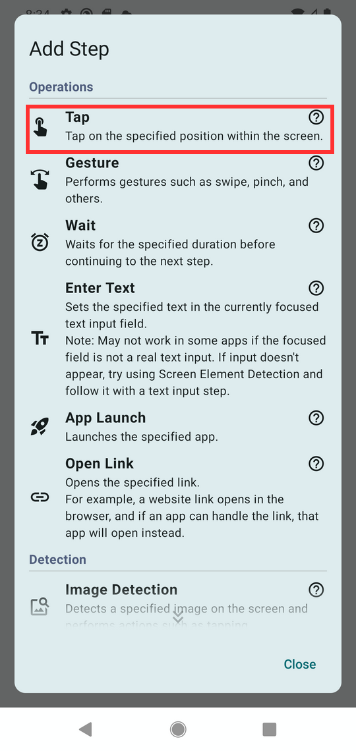
The Tap Position Tool will open.
Tap near the marker to set the location, then tap OK at the bottom.
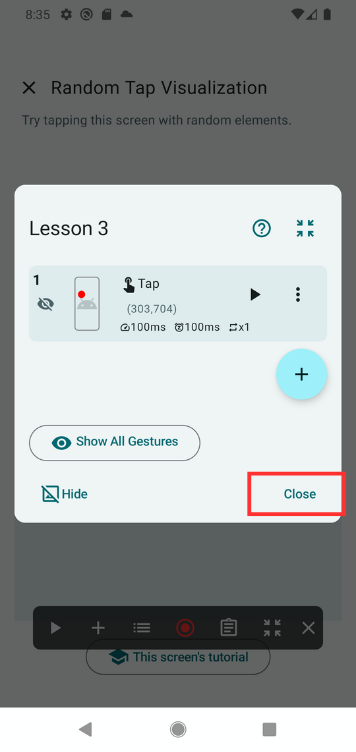
Once the step is added, the step list will open.
Confirm that the step has been added, then tap Close to dismiss the list.
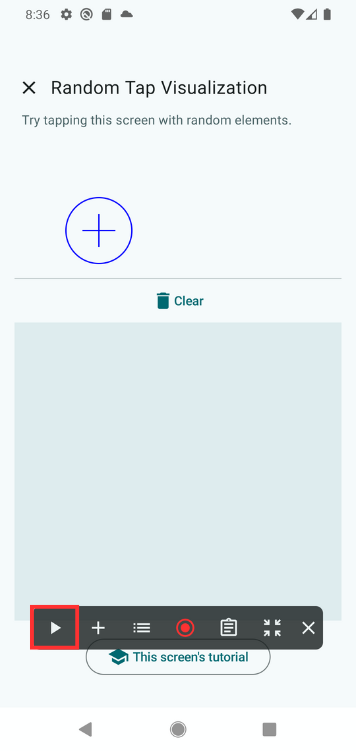
4. Play the Scenario
Now let’s run the scenario to check the behavior.
Tap the ▶ button on the Scenario Controller.
You should see TapEzy repeatedly tapping the same position (the center of the marker).
Tap the ■ button to stop playback.
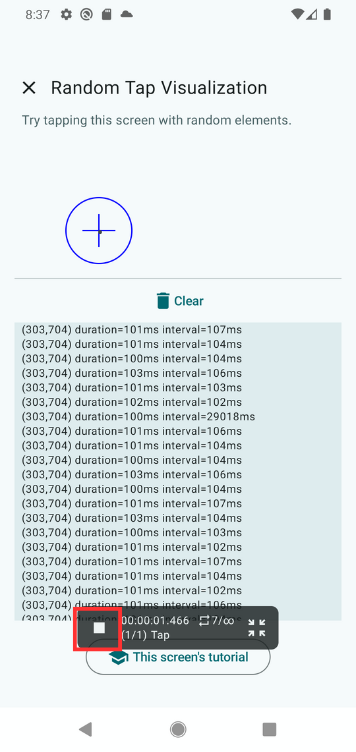
At this point, no randomness has been applied, so the tap location and timing should be consistent.
You’ll also notice that the duration and interval are about 100 ms each.
Once confirmed, tap Clear in the practice app again to reset the log.
5. Add Randomness
Now let’s add randomness to the tap step you just created.
Tap the list icon in the Scenario Controller to open the step list.

Tap the step you created to open the Edit Step screen.

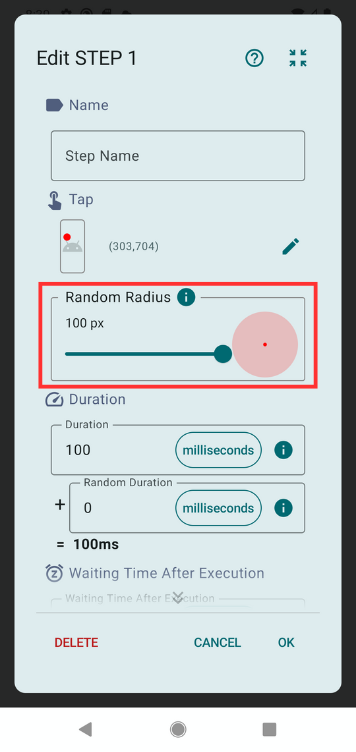
Add Random Tap Radius
Move the Random Radius slider to the maximum: 100px.
This setting allows taps to occur randomly within a 100-pixel radius around the originally selected position.
A red circle will appear on the screen showing the possible tap area.
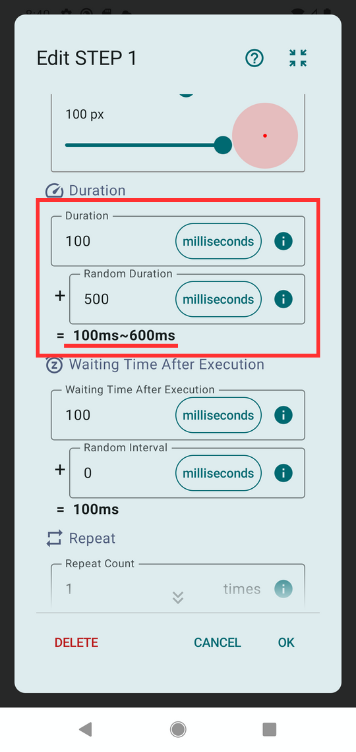
Add Random Duration
ℹ️ By combining Execution Time and Random Execution Time, you can create more natural variation.
Currently, Execution Time is fixed at 100 ms.
Set Random Execution Time to 500 ms.
This means the tap duration will randomly fall between 100 ms and 600 ms.
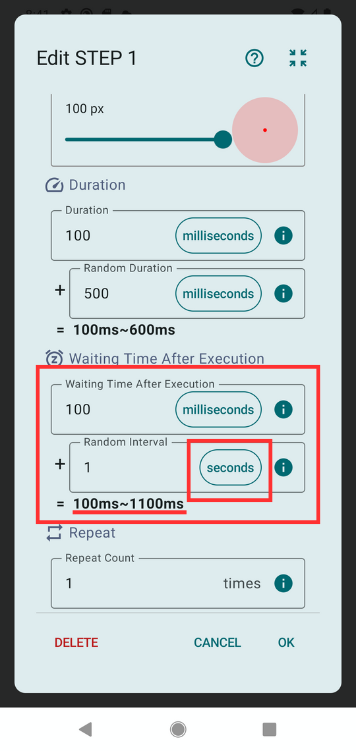
Add Random Wait Time
Now let’s add randomness to the wait time after the tap.
ℹ️ You can tap the unit label (e.g. “ms”) to switch to “seconds” or “minutes.”
Switch the unit to seconds, and set Random Wait Time to 1 second. This means the wait time will randomly range between 100 ms and 1.1 seconds.
The range will be displayed beneath the field.
6. Play the Scenario Again
Let’s run the scenario again and check the result.
You should see:
- Taps occurring randomly within the circle around the marker
- Tap durations randomly between 100 ms and 600 ms
- Wait times between 100 ms and 1.1 seconds
Summary
In this lesson, you learned how to add randomness to Tap steps to simulate more natural behavior.
By observing the results, you confirmed:
- Tap locations vary each time within a defined area
- Tap durations and intervals include natural variation
📚For more details: