In this lesson, you’ll create a scenario that uses text detection to drag specific text elements on screen.
Through a mini-game that involves clearing text cards, you’ll learn the basics of how to use the text detection feature.
You will learn:
✅️ How to use the Text Detection step
✅️ How to drag between detected text elements
📥 Download the prepared scenario
(optional – for reference or comparison)
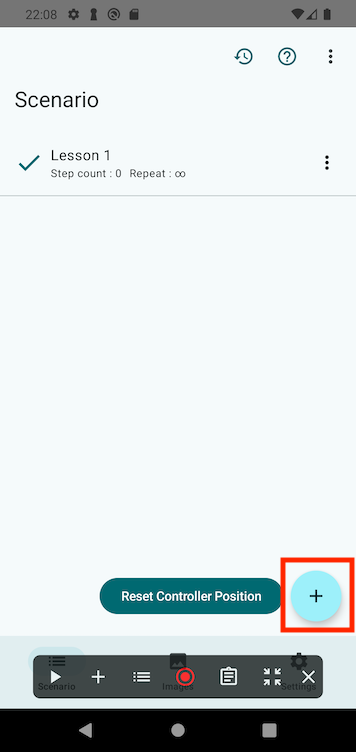
1. Create a New Scenario
Start TapEzy and create a new scenario.
If this is your first scenario, tap the “Create your first Scenario” button in the center of the screen.
If you already have one or more scenarios, tap the + button in the lower-right corner.

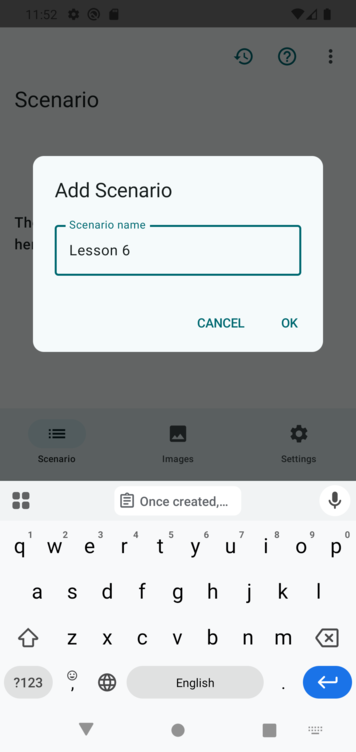
Give your scenario a name like “Lesson 6” and tap OK.
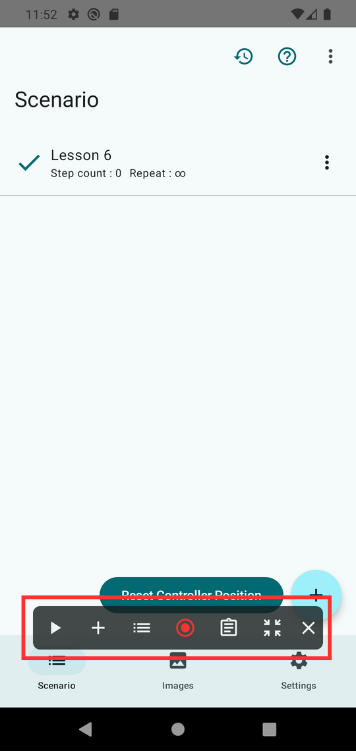
Once created, the Scenario Controller will appear at the bottom of the screen.
2. Open the Practice Screen
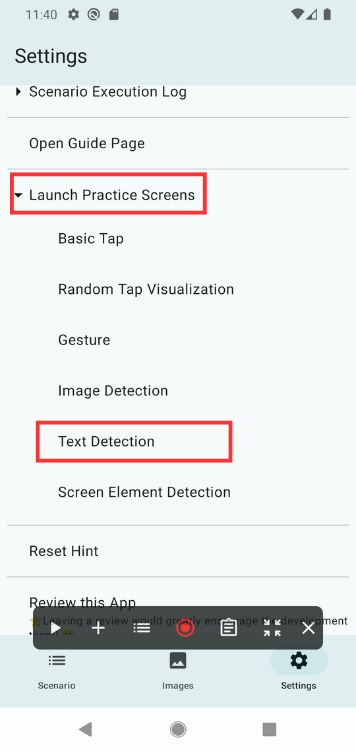
Open the practice screen from TapEzy’s settings.
In TapEzy’s settings, tap “Launch Practice Screens”, then select “Text DetectionText Detection”.
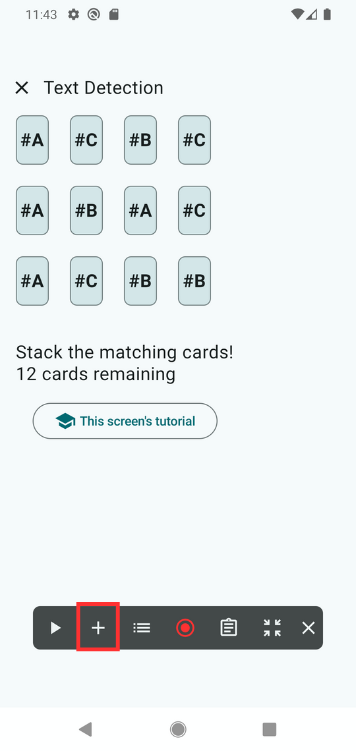
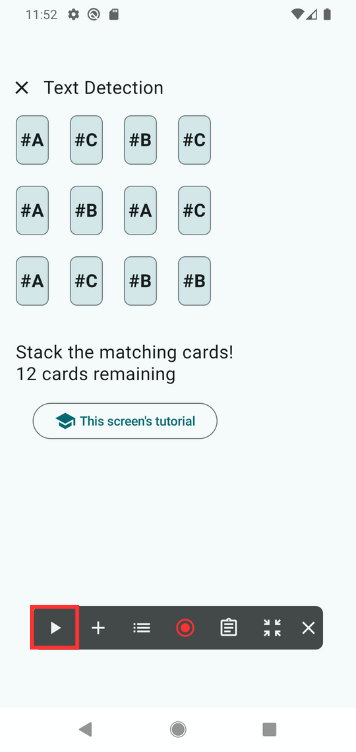
You will see a screen with cards labeled like #A, #B, and so on.
This is a mini-game where you drag matching cards on top of each other to make them disappear. When all cards are gone, you clear the game.
Try dragging the cards to see how the interaction works.
3. Add a Text Detection Step in TapEzy
Now let’s create a scenario to automatically clear the game using text detection.
Tap the + button on the scenario controller and select Text Detection

A screen will appear prompting you to enter the text to detect.
Enter the following text:
#A
#B
#C
Be sure to use half-width (ASCII) characters for the #.
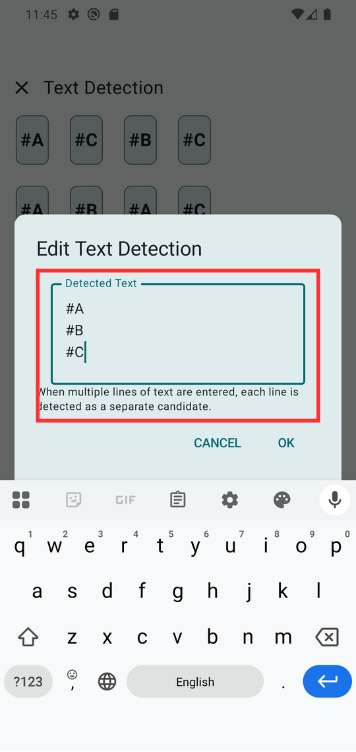
After entering the text, tap OK to confirm.
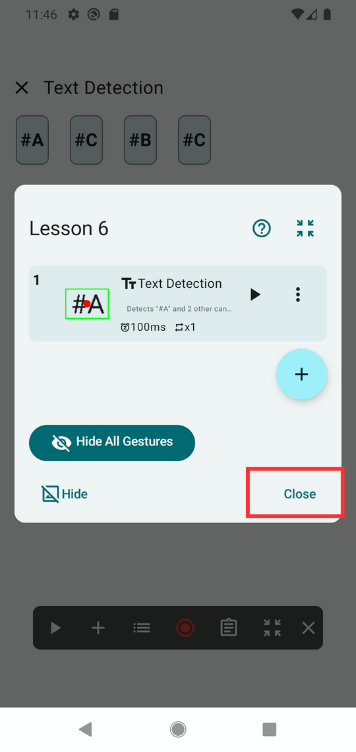
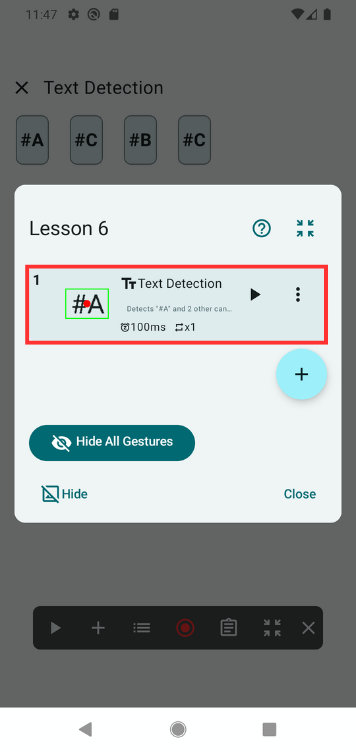
You will be taken to the step list screen. You should now see the newly added step in the list.
A red dot will appear at the center of the detected text.
This is because detection-type steps are set by default to tap the detected element when added.
Tap Close in the lower right to return.
4. Change the Action to Drag Between Detected Texts
By default, detection steps are set to tap the detected text.
In this lesson, we want to drag between matching text elements instead.
Tap the list button on the scenario controller to open the step list.

Then tap the Text Detection step you just added to open the step editor.
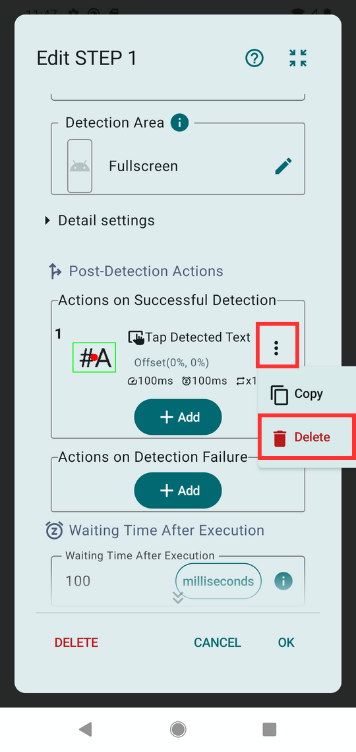
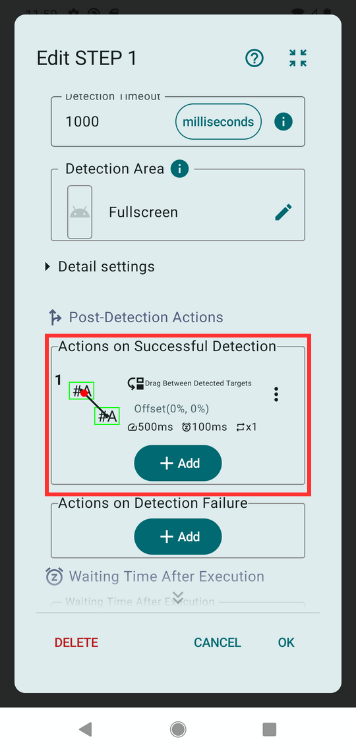
Scroll down if needed and look under Action on Detection Success.
You’ll see an action labeled Tap detected text — let’s delete it.
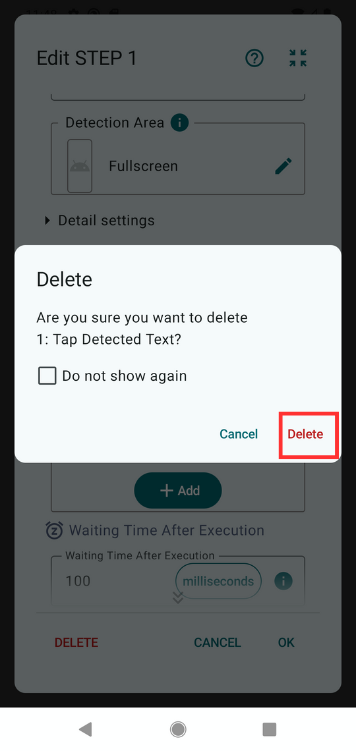
Tap the three-dot menu to the right, then tap Delete, and confirm when prompted.
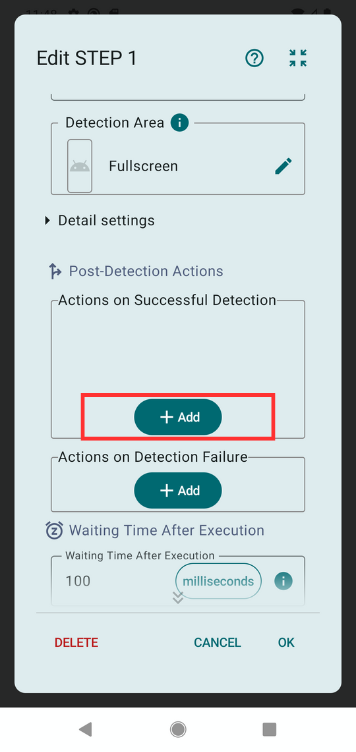
Now that the default tap action has been removed, let’s add a drag action instead.
Tap Add,
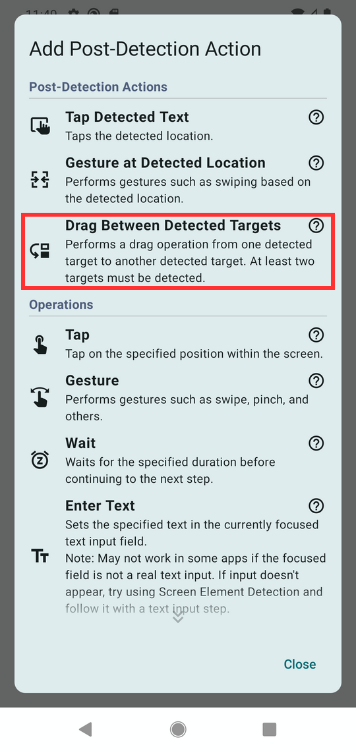
then under the Post-Detection Action Group, tap Drag between detected text.
The “Drag Between Detected Targets” action will perform a drag from one detected instance of the same text to another.
For example, if two #A texts are detected, the gesture will drag from one to the other.
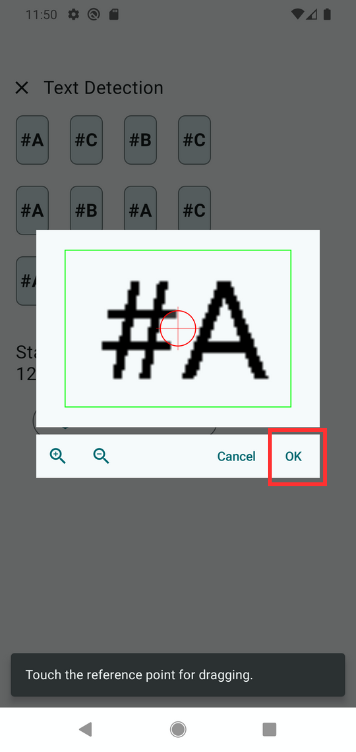
A prompt will ask you to set the drag starting point (anchor).
By default, the center of the detected region is selected, which works fine for this lesson. Tap OK to confirm.
Now the action has been updated. You should see Drag between detected text listed as the detection success action.
5. Set the Detection Area
You can run the scenario as-is, but without limiting the detection area, the system may mistakenly detect unrelated text outside the cards.
To prevent such false detections, let’s define a proper detection area.
We strongly recommend setting the detection area whenever using text detection.
Open the step editor for the Text Detection step again, and look for the Detection Area setting.
It should currently say Full Screen. Tap the ✏️ icon next to it.
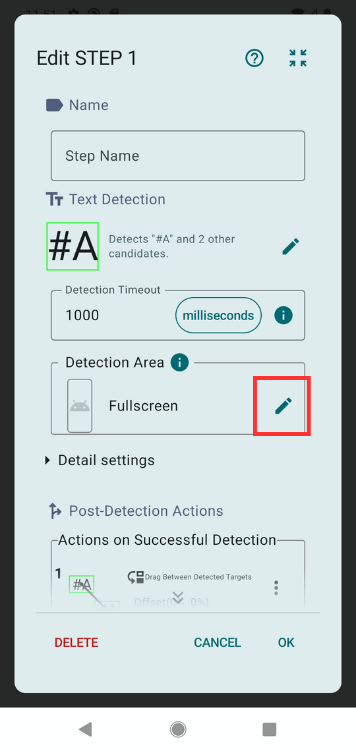
When the detection area screen opens, drag to specify the area where the cards appear.
Once you’ve selected the appropriate region, tap OK to confirm.
6. Run the Scenario
Now the scenario is ready to run. Tap the ▶ button on the scenario controller to start playback.
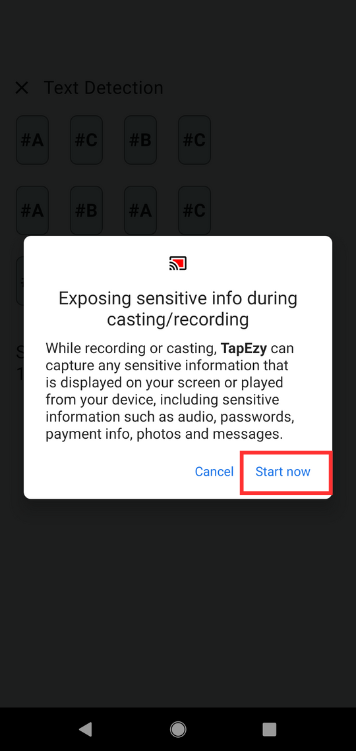
You’ll see a dialog like the one below asking for screen recording permission:
It appears whenever an app needs to capture screen content. The dialog text may vary depending on your device and Android version.
Please tap Start now or equivalent to proceed.
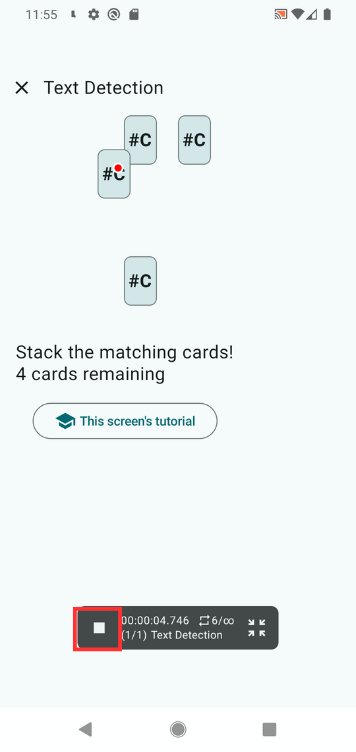
Once started, you’ll see the cards being automatically dragged and cleared — demonstrating that the scenario is working.
To stop playback, tap the ■ button.
Summary
In this lesson, you learned the following:
- How to detect specific on-screen text and use that to control UI interactions
- How to add and configure a Text Detection step
- How to use the “Drag Between Detected Targets” action
- How to define the detection area to avoid false positives and reduce processing load
You should now be able to create scenarios where text elements are automatically dragged based on detection.
📚For more details: